Since this is a post about tracking live musicians, first you need too find someone you want to record.
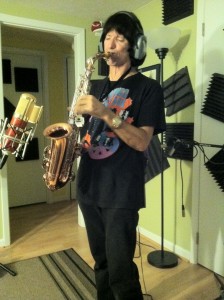
 I just happened to meet Nick Savage, Alto Saxophonist with Bo Diddley on a gig I did in Destin, Florida. I had taken Ableton Live on stage that night and was switching between my 5 string Ibanez bass and playing bass synth with patches loaded in Live. Nick became intrigued with the sounds I was pushing out and on the break we talked a bit. Long story short we agreed too get together again and see what could come of it.
Nick called one day and said he was coming back to the area. I asked if he might like to play on a track I was developing for my Ableton 1 class project at Berklee Music. He said sure, he’d love to play.
My education tracking live musicians with Live started right then.
Nick showed up with a Genisis MXL mic. What a gorgeous sound we got from that mic. The first night was rough. I hadn’t really figured out my headphone amp nor how to create a submix using Ableton’s return tracks. Nonetheless we got some good takes but the sound in the headphones was too loud (or too soft) and I just wasn’t getting how to create the submix. We agreed to get together the next night and I knew I would spend the next day working with Ableton to get a great submix.
I had written Louden Stearns (my Ableton instructor) basically saying help! I had tried to create the return track and route the audio to its own output on my Focusrite Saffire 24 pro but it wasn’t working. Louden was very helpful and gave me the answers I was seeking. But putting them into practice took me a little while to figure out.
I first set up an audio track with a test mic (an SM 58) and verified I was receiving input from the mic/mic pre (my new VTB-1)/Saffire Pro 24 on the track. I optimized the gain at each point in the chain. I knew I was recording a single track of Nick (not stereo) so I set the Ableton Audio tracks’ AUDIO FROM Input Chooser to EXT IN (the default setting) and the chooser below that to 1 (for only recording 1 mono channel).
I then created a return track for this submix (right clicked on an open area either in Session or Arrangement view/Insert return track). On the master channel with the I/O controls visible I set the submix Return tracks’ Pre/Post toggle to PRE. This made the Audio tracks’ volume fader have no effect on the level sent to the Return track by the SEND level volume control.
The Saffire Pro 24 has a Mix Control program that provides a GUI for setting signal routing to various outputs. DAW 1 and 2 carried the main studio mix. I set DAW 3 and 4 to carry the headphone mix from the return track. I had patched two cables from the Saffire Pro outputs 3 & 4 into the inputs 1 & 2 of the Mini Headphone Amp. I centered the balance and turned up the volume on the Mini Headphone amp about 1/2 way. If I got signal to that unit I would see the LEDs light up.
I talked into my test mic and brought up the Send Level Control for my submix Return Track. And nothing worked. Zip. Nada. Not a peep or an led lighting up.
After a bit of just thinking about what I would do if I was an audio signal trying to reach a headphone amp I just started trying things. (This is the HAA! method meticulously documented here: http://www.goldfliesmusic.com/2011/08/haa/)
The final step (which after I did it seemed really obvious) was to change the setting in the AUDIO TO chooser of the Return Track from MASTER to EXT. OUT. In the 2nd chooser I then selected routing channels 3/4 and there was my signal being routed to my Mini Amp Headphone Amp. Bingo!
A good mix changes everything.
When Nick came by that 2nd evening I was able to dial in whatever we wanted into his headphone mix. So we started cutting tracks. What was interesting is that we would make a pass and stop. I would then:
- Command/Drag the Audio track under the one we just cut and create a new track with all my settings intact.
- I clicked on the audio data that came with the copied track and deleted it.
- I turned OFF the Track Activator Toggle on the first track,
- Clicked on the timeline where I wanted the next take to start
- Verified that the new track was record enabled,
- Clicked on the global record button and then hit play.
It sounds like a lot to do but after a couple of passes this can be done very quickly. Keeping the flow of the session moving forward was critical. While I’m running Live on a Macbook Pro, Nick is trying to play cool, creative licks. These are two very different mind sets and as the engineer on this session I wanted to get Nick into the flow of creativity and keep him there.
BTW, that is the goal of all of this – to get your performers into a mental state where the recording process is transparent and not a factor. You want their focus on music, expression, timing, pitch, the joy of a great, responsive sound.
It is this last bit – creating a responsive sound where that I found an interesting technique I could use to inspire and in fact influence the performance. Nick and I finally got into a groove -me creating tracks and recording and Nick playing, I started thinking it would be cool to put some effects on the track. At first I tried just turning up the Send volume controls on a return track that had a reverb on it. I now know this would have worked had I assigned the Reverb Return Track to the same EXT. OUT and routing channels 3/4. When I didn’t get any reverb I just real-time grabbed a Reverb from the Audio Effects Browser in Live and dropped it on the submix RETURN track. I adjusted the dry/wet level and reverb length on the fly.
All of a sudden Nick came alive. Hearing his horn in an ambient space made him FEEL like his horn was creating a real, 3d performance. He was controlling his space with his horn. Nick was able to play with the sustain of the note he just played and his playing just opened up. That was cool.
Never one to leave things alone I then dropped a delay on the track. Nick started playing staccato, pointed lines that worked with the timing of the delay. As I changed the reverb and delay settings Nick would adjust his playing. This got to be really fun. So fun I added an Auto Filter and start working with his timbre real time. He was digging it and dug even deeper for great horn lines.
When we came to the end of this process there was an unexpected bonus. All the changes I had made to the Live Fx patches had been recorded as automation data.. It was all there to use as we pleased.
I learned a lot that night. How to set up the submix. How important it is for the recording system to get out of the way of the performer. And how psycho-acoustic effects really can change the mood and output of a performer. While I’m the first to admit I’m Ableton centric, I couldn’t have been more pleased with the work flow of the software and the total realtime flexibility when tracking a live musician.
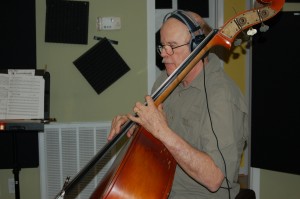
 Later for this tune I tracked Bassist Steve Gilmore, vocalist Tony Delamont and Pianist Amanda Matthews. In each case the above techniques made each performer comfortable and able to give their best performance.
Here is the tune I’ve been talking about.
I’d love to hear about your tracking experiences. Feel free to comment or add your own tips and stories to this article.
Would love to hear Nick play again one day ! I use to go to a small bar in Florida (in the back woods) and listen to him play that sax …..soooo good ! Anyway to email or contact him ????